Cinematographers
Cinematographers can upload and view videos, view the client edits requested, and request media from clients to add to the video, all from the “Video” page which is accessed through the project dashboard.
Compression Guidelines for Exporting Videos
Overview: Follow the instructions below to create video files that will upload successfully, quickly, and look beautiful for your clients. Although ClikNview accepts a wide range of video file types and settings, these are the recommended settings.
Container: MP4
Video Codec: H.264
Audio Code: AAC-LC
Frame Rate:
Videos should be encoded and uploaded in the same frame rate it was recorded.
Interlaced videos should be deinterlaced before uploading. For example, 1080i60 content should be deinterlaced to 1080p30. 60 interlaced fields per second should be deinterlaced to 30 progressive frames per second.
Bitrate:
| 1080p | 10 Mbps - 20 Mbps |
| 720p | 6.5 Mbps - 9.5 Mbps |
| 480p | Not Recommended |
Uploading Draft Version of Videos for Review
Overview: This section will show you how to upload the draft video(s) for you clients to review and provide their edit suggestions.
- Log into your account and click on the project you’d like to add the video(s) for.
-
Click on the
button to enter the Video page.

-
Click on the
button.

-
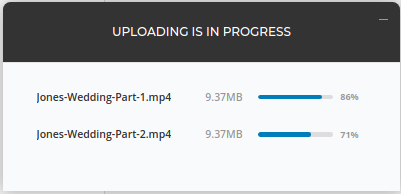
You can view the progress of the videos being uploaded while you wait.
-
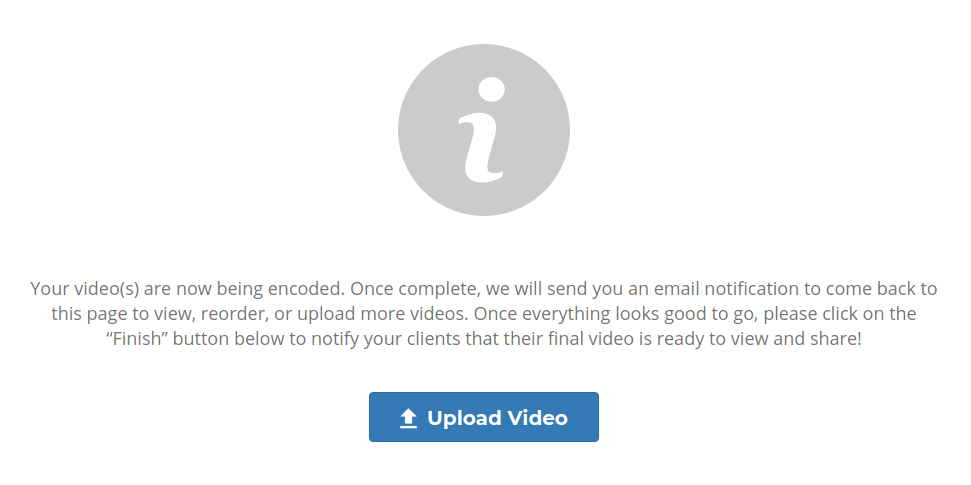
Once all videos have completed uploading, we will notify you via email that the processing has been completed. Or, you can refresh the page to see the videos as soon as they are available. You will see the following screen:
You can choose to upload more videos if you’d like.

-
Once all videos have been processed, refresh the videos page.
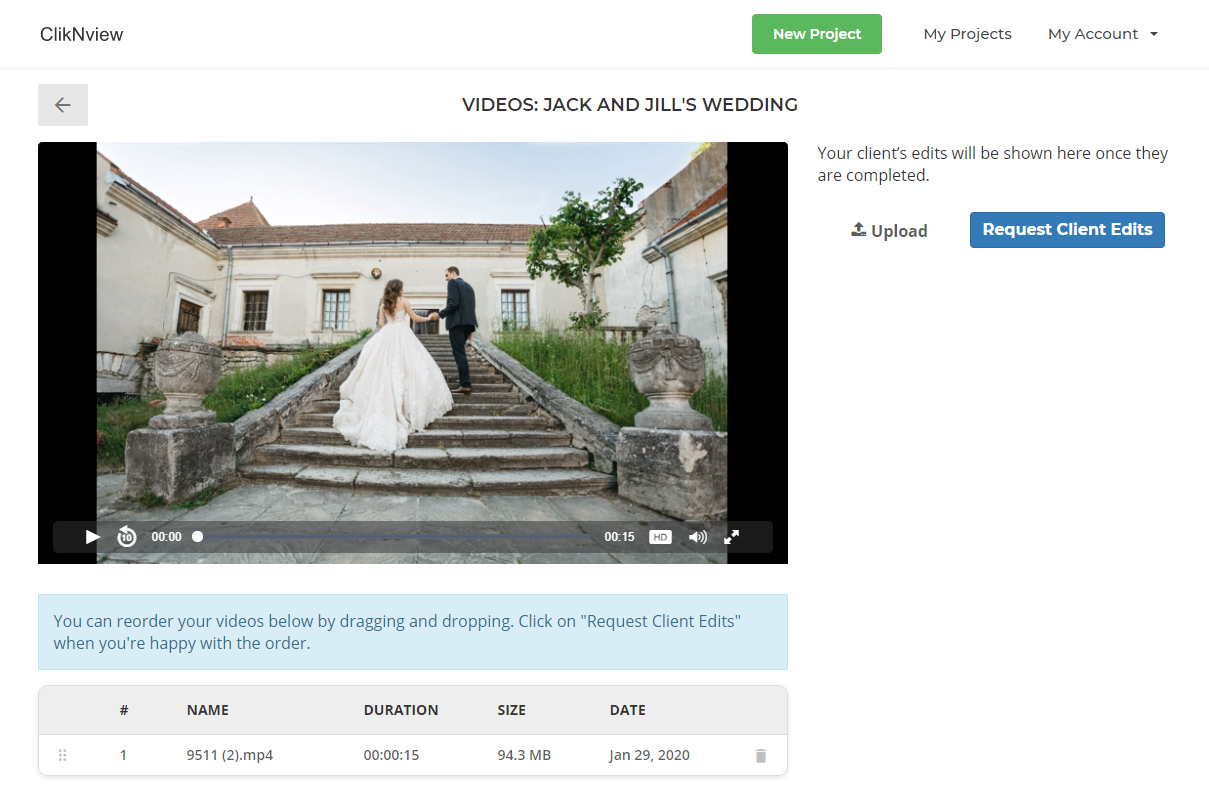
- You can reorder the videos by clicking and dragging the icon. Also, you can delete a video by clicking on the icon.
-
To send this video to your clients so that they can begin editing, please click on the
button on the top right of page.

-
Set the number of days you’d like for them to have access to this draft video.
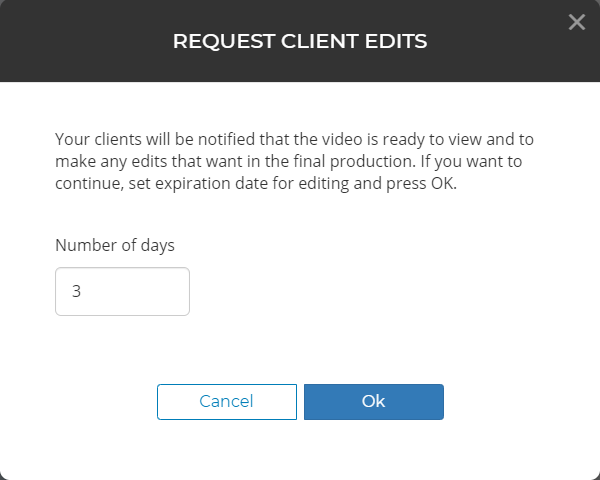
- Click on “Ok”.
Please note that you can watch the videos while you wait for your clients to send the review notes. Once they are complete, we will notify you via email to check their review notes. Also, please note that the uploading of large video files can take several hours to complete.
Uploading Final Production for Digital Delivery
Overview: For some projects, you just want to send the final product to your client without the video review process. These may be projects that you completed long ago or that do not require feedback from clients. This section describes how to deliver the final video to your client.
-
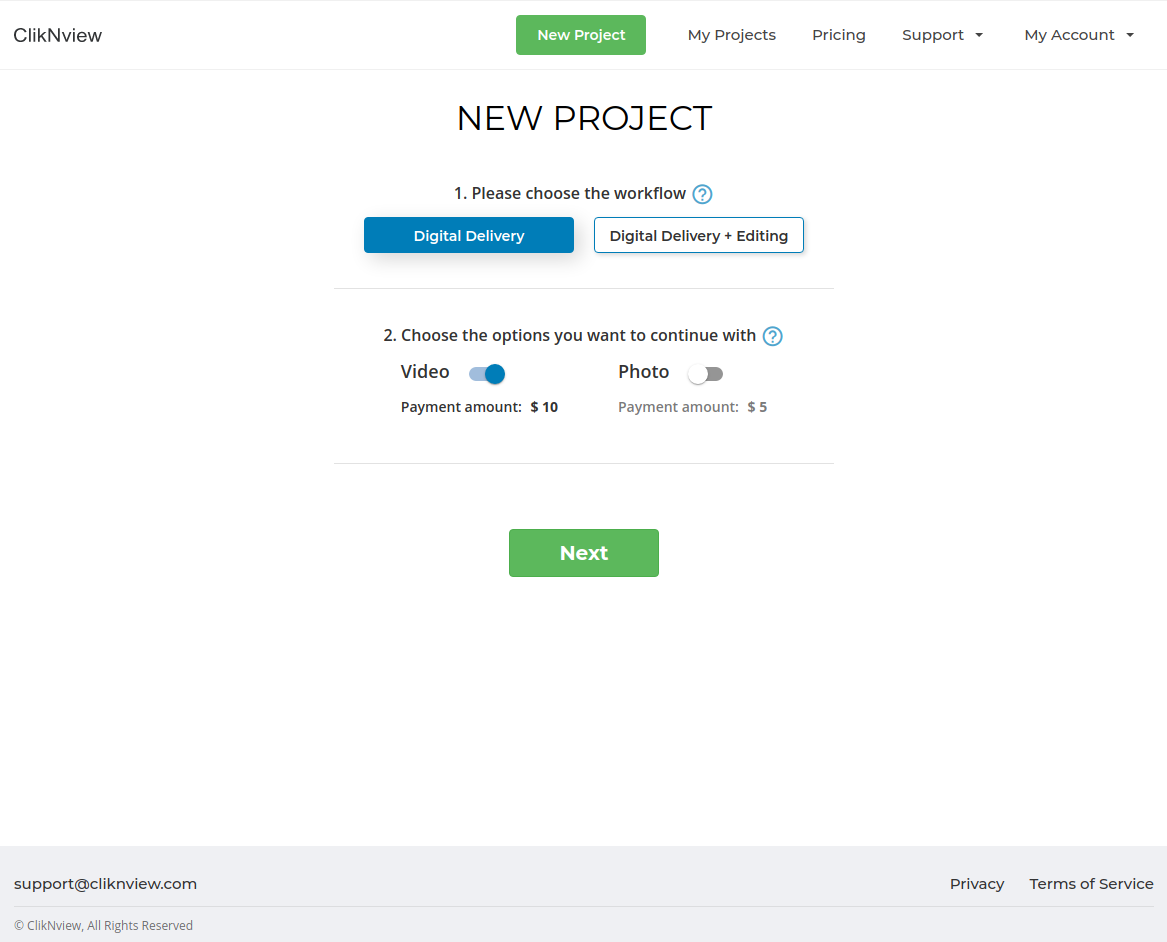
Create a project with Digital Delivery enabled and Video option toggled on.
- Enter client details. For more information on each of the fields, refer to the section on creating projects.
-
Click the
button to enter the Video page.
-
Click the
button.
- Select all the video files for this project. Don't worry about the order of the files now, you will be able to reorder them before sending to your client. Also, you will have an opportunity to upload more files so no need to worry if you miss a file at this stage.
- The upload may take several hours, depending on the combined size of the files and upload speeds. For details, see the FAQs page and the compression guidelines on this page. Note that if the upload is interrupted for whatever reason, you can pick up where you left off by selecting the same files. ClikNview supports resumable uploads so the uploaded content is not lost.
-
After the upload is complete, you will see a message notifying you that the videos are being processed. This is another long-running processes, since the videos need to be encoded in a format that is optimal for streaming. You will be notified via email as soon as the videos are ready. Note that in the meantime you will have the ability to upload more videos, in case you missed any in a previous step.
-
After processing is complete, you can return to the video page where you will have a number of options.
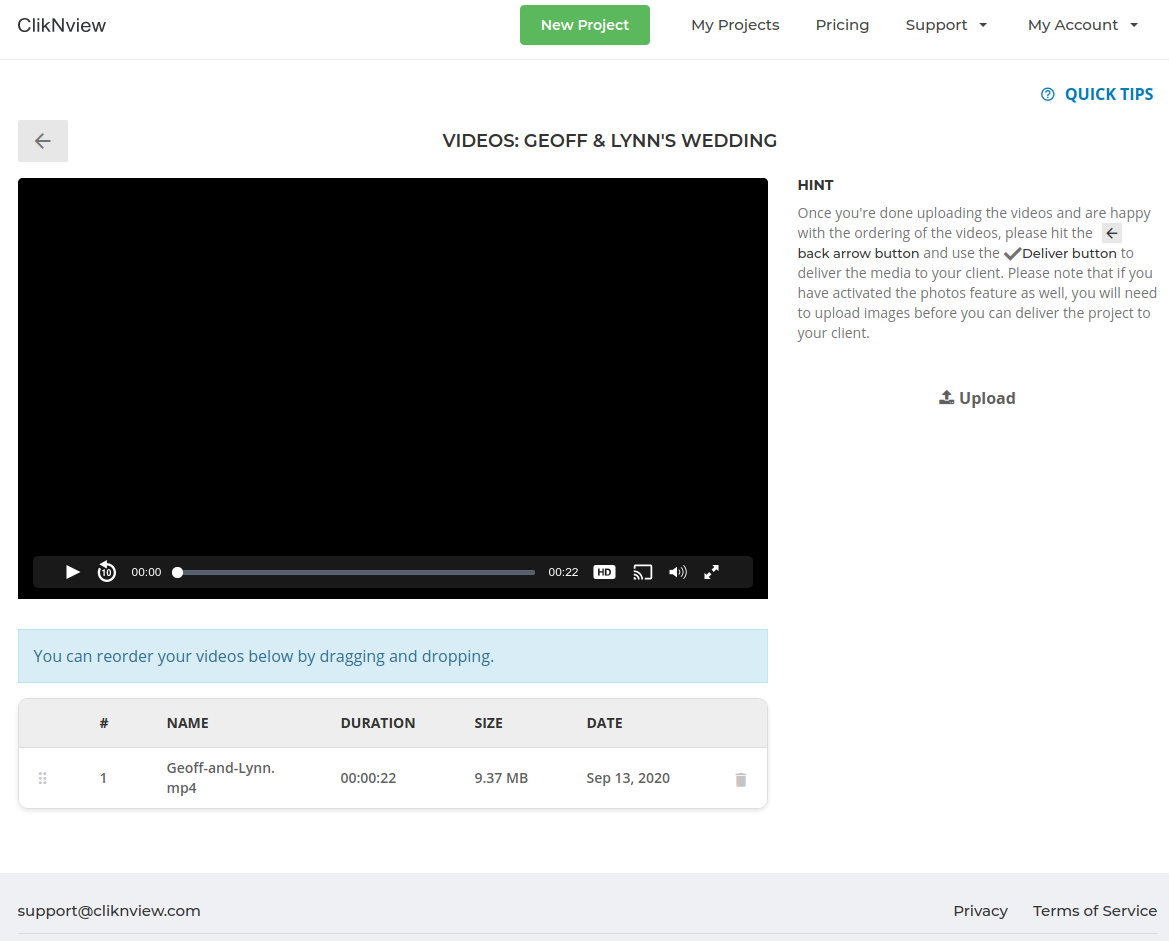
- You can reorder the videos by clicking and dragging the icon. Also, you can delete a video by clicking on the icon.
-
Click the
button to upload more videos.

-
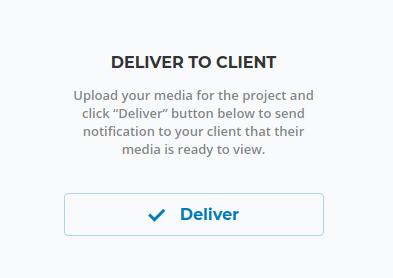
Follow the instructions in the Hint to deliver the videos to your client. Use the
to go back to the Project Summary page and use the Deliver button to finalize the project and send it to your client.
Requesting Media
Overview: Requesting media is a feature that some cinematographers utilize when they need videos, photos, or music from their clients to be incorporated into the video. For example, some cinematographers like to add baby photos of the couple at the beginning of their wedding video. This is an easy and streamlined way to request such content and have it stay organized.
- Log into your account and click on the project you’d like to request media for.
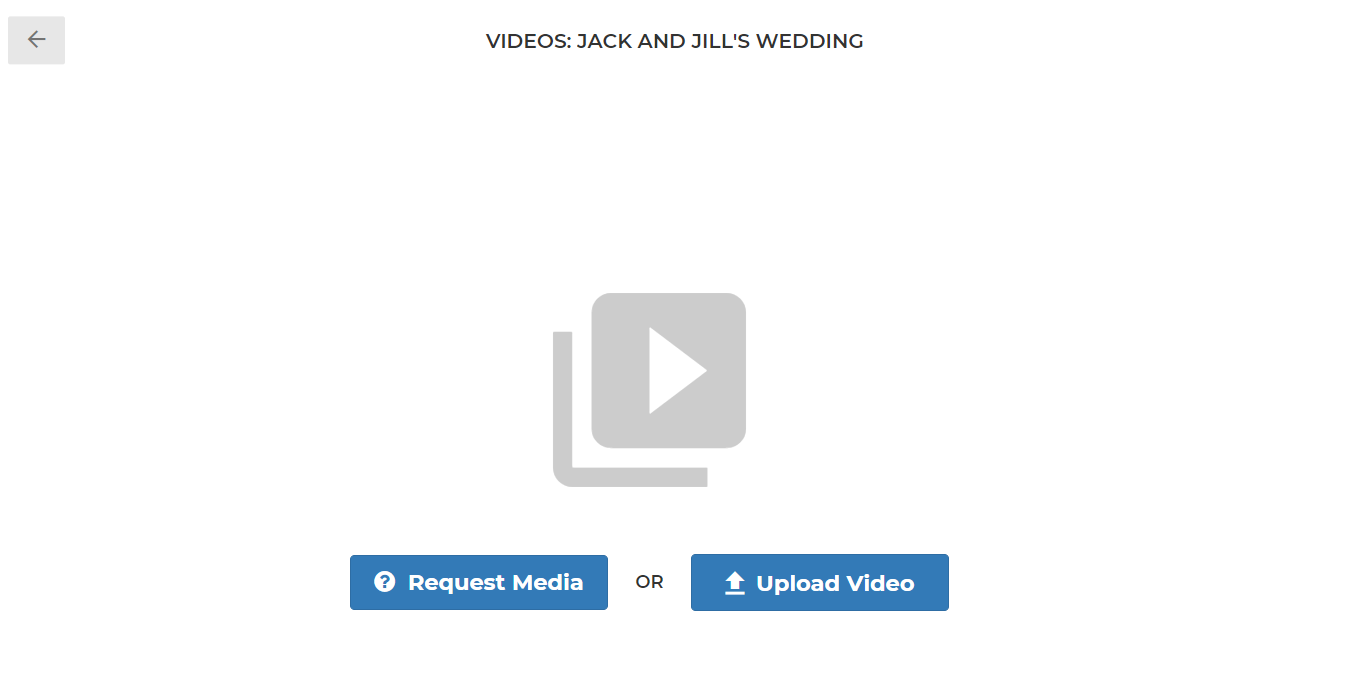
- From the project dashboard page click on “Videos”.
-
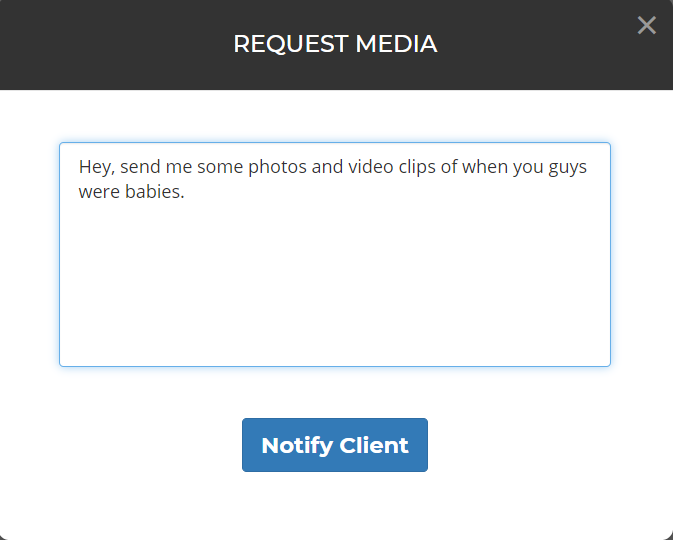
Select “Request Media”
-
Write a message to your clients and click on “Notify Client”. This can be instructions on what type of media you’d like.
Your clients will be automatically notified via email along with your instructions on what to do. Once they are complete, you will get notification via email. Also, you can cancel the request at any point.
Cancelling Media Requests
-
From the project summary page, click the
button to enter the Video page.
- Click the “Cancel Request Media” button.
You can now upload a video(s) or you can make another request for media.
Viewing Requested Media
Overview: We will notify you via email once your clients have submitted their photos, videos, and/or music that you requested. Until then, you cannot view the Requested Media page. Once you’ve received email confirming that your clients have submitted their files, follow these steps:
- Log into your account and click on the project you’d like to review the media for.
-
Click on the
button.

-
You can download files individually by clicking on the
icon, or you can select multiple files and click on the
button that will appear on the top of the page.

You will now be able to upload the draft video for review by visiting the “Videos” page.